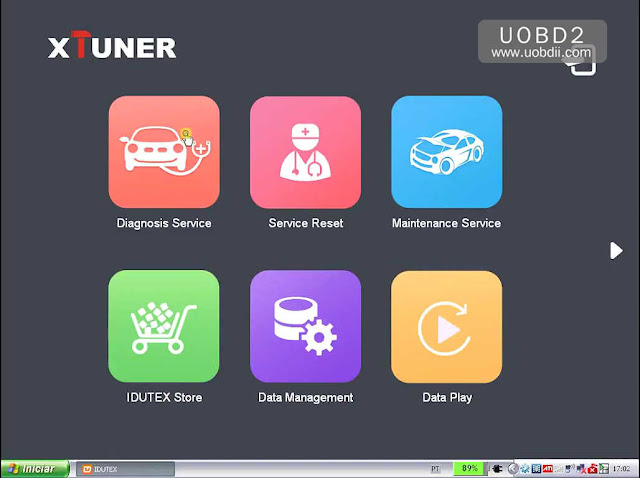
Here i want to share the guide on how to use XTUENR E3 diagnostic tool DTC Query function.Hope it helps!
DTC query function is a DIY function, users can query, modify and create OBD DTCs by themselves requirement in local DTCs, and users can synchronize to XTUNER TDINTEL company cloud server thought the internet too.
Enter DTC query to input your trouble code to get the meaning.
XTUNER E3
Article from:http://blog.uobdii.com
Sunday, February 10, 2019
Friday, February 8, 2019
How to Use XTUNER E3 to Diagnose Hyundai Elantra HDC 2012
I will show you how to diagnose Hyundai Elantra(HDC) 2012 G 1.6 DOHC by Xtuner E3 Wifi on
Android-based PAD win10. To me, Xtuner E3 Wifi is worth each penny, it
can do what I want it to do, so I would like to share what I test ok and
communicate with you who have Xtuner E3 or will own one.
Tool to prepare:
Function to display:
Read and clear DTCs on Engine,
Read data stream
BCM active test, Wiper relay and Head Lamp relay
Communicate: Via WIFI
Procedure:


Tool to prepare:
- Xtuner E3 wifi OBD2 scanner, $145 free shipping at uobdii.com, 3-5 working days delivery. BTW, Angela is experienced customer service, she is very familiar with E3 and we chat friendly.
- Android-based PAD win10 with WIFI available
- Hyundai Elantra(HDC) 2012 G 1.6 DOHC
Function to display:
Read and clear DTCs on Engine,
Read data stream
BCM active test, Wiper relay and Head Lamp relay
Communicate: Via WIFI
Procedure:
- Connect PAD WIFI.
- Click “Xtuner E3.exe” and come to the function menu.
- Click “Settings” to check Xtuner E3 basic version incl. system version, firmware version, link version and serial number.
- Back to the menu, click “Expert Service System”, and choose Hyundai PRO v19.1.
- Choose “Diagnose”-> “Vehicle Manual Select” incl. Area, model, year and engine. E.g Hyundai Elantra(HDC) 2012 G 1.6 DOHC.
- Click “system selection”, Xtuner E3 covers Engine, AT, ABS, airbag, BCM, IMMO and CODE. Here I select “Engine” to read and clear DTCs.
- Function: data list
- Click “BCM”->”active test”-> “Wiper relay”, then “Head Lamp relay”,
UOBDII All rights reserved Diagnose Hyundai Elantra (HDC) 2012 by Xtuner E3 Wifi on PAD win10
Wednesday, February 6, 2019
XTUNER E3 Client Installation and Activation Guide
This article for educational purpose on how to install and active XTUNER E3 client.If you want more info please visit XTUNER E3 usermanual.
Installation of XTUNER E3 Client:
Download XTUNER E3 client on:http://www.tdintel.com, and download “XTUNER-E3 Setup Vx.xx”
Unzip XTUNER E3 Setup Vx.xx and run XTUNER E3 setup.exe:


Please click “Next”

Please click “Next”


Please click “Install”


XTUNER E3 wireless diagnostic service system installs successfully.
Active XTUNER E3 Client:
At first, please keep network working. Run XTUNER E3 APP, then click “Online store” to get applications.

Please wait…

Please click “Online Store”

Please input the S/N number and password getting from the envelope, and then click “Login”.


Please click “Login”

If the product is not activated, please click “Yes”.

Please input your information, the Email address and country are required, and then click “Activate”.

Note:Your email address must be real in order to get the activated link and the further better service from the manufacturer.
The software update reminder and the new product release information will be sent to your email.If you do not receive the activation email, please add “service@tdintel.com” to the white list of your mailbox and try the activation process again.Company name: company name must be filled in and the length is within 250 characters.OBD360
Country: please choose your country in the list. Press “Yes” to confirm your information:

Please click the link to get the confirmation from the manufacturer.

Installation of XTUNER E3 Client:
Download XTUNER E3 client on:http://www.tdintel.com, and download “XTUNER-E3 Setup Vx.xx”
Unzip XTUNER E3 Setup Vx.xx and run XTUNER E3 setup.exe:
Please click “Next”
Please click “Next”
Please click “Install”
XTUNER E3 wireless diagnostic service system installs successfully.
Active XTUNER E3 Client:
At first, please keep network working. Run XTUNER E3 APP, then click “Online store” to get applications.
Please wait…
Please click “Online Store”
Please input the S/N number and password getting from the envelope, and then click “Login”.
Please click “Login”
If the product is not activated, please click “Yes”.
Please input your information, the Email address and country are required, and then click “Activate”.
Note:Your email address must be real in order to get the activated link and the further better service from the manufacturer.
The software update reminder and the new product release information will be sent to your email.If you do not receive the activation email, please add “service@tdintel.com” to the white list of your mailbox and try the activation process again.Company name: company name must be filled in and the length is within 250 characters.OBD360
Country: please choose your country in the list. Press “Yes” to confirm your information:
Please click the link to get the confirmation from the manufacturer.
Monday, February 4, 2019
How to Use Vpecker Easydiag Diagnose Opel Astra H
Got one Vpecker diagnostic adapter, it perfectly diagnose Opel Astra H, here I'd share the procedure. More diagnostic tool for vehicle check here:
http://www.uobdii.com/wholesale/car-diagnostic-tool/
Procedure:
Click on "Diagnosis service"
http://www.uobdii.com/wholesale/car-diagnostic-tool/
Procedure:
Click on "Diagnosis service"
Saturday, February 2, 2019
Using Xtuner E3 for BMW 520d Diagnosis and initialization of CBS service
Using Xtuner E3 to perform BMW 520d Diagnosis and initialization of CBS service in step by step procedure.
Procedure:
Before using Xtuner E3, you are advise to read the quick user manual first.
Click on "Diagnosis service".

Procedure:
Before using Xtuner E3, you are advise to read the quick user manual first.
Click on "Diagnosis service".

Subscribe to:
Comments (Atom)


